
Before, installing x11vnc on Kali Linux (Raspberry Pi). First, let us know what is x11?
x11VNC is a Virtual Network Computing (VNC) server program that allows remote access from a remote client to a computer hosting an X Window session & the x11vnc software, continuously polling the X servers frame buffer for changes. Using remote desktop connection we can connect any remote system & access graphical user interface & work.
Commands to install & run x11vnc in Kali Linux:
sudo apt update
sudo apt install x11vnc -y
After x11vnc is installed you can start the services with the following command:
vncserver
Now, create a password for your vncserver which is used to connect the Kali Linux.
Here, you’ll find the port which is used by the x11vnc server which you can use the port number while connecting to the Kali Linux. Also, to know your IP address use the following command in your terminal:
sudo ifconfig
To know the vncserver status use the following command:
sudo service vncserver status
If the status shows active then vncserver is working fine. You can proceed to further instructions.
But, whenever you try to connect vncserver either with mobile or pc/laptop, you’ll most probably face the issue as shown in the below picture:

Um! Let’s solve this 🙂
Before, solving this error. First, let us know why we got this error? As the screen resolution isn’t configured properly thus, we used to get this kind of issue. If we properly configure the screen resolution then it will work.
vncserver -geometry 1980x1080

sudo nano /home/kali/.vnc/xstartup
You’ll have the screen shown in the below picture:
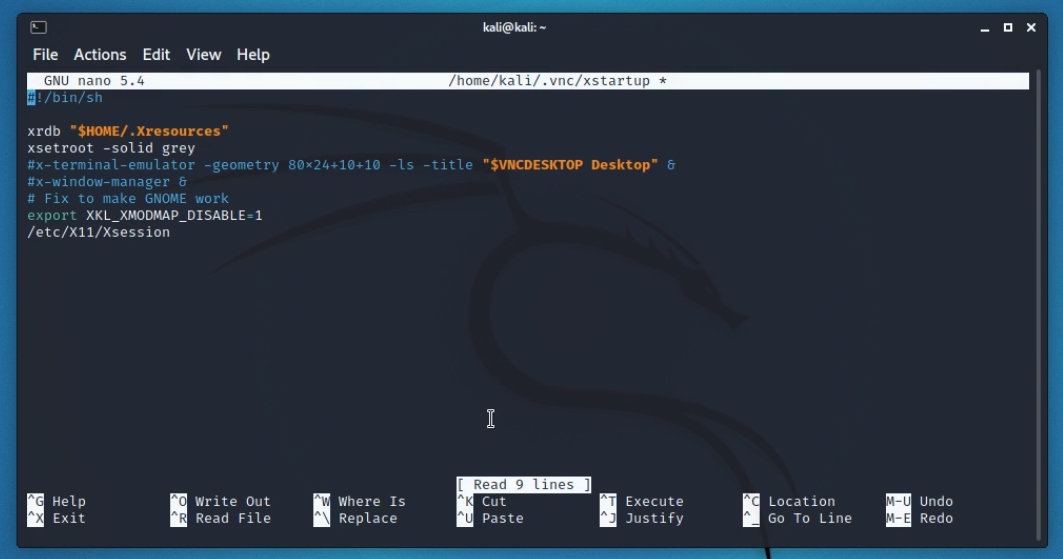
Now, make sure you comment on every line with the “#” symbol at the beginning of each & every line as shown in the below picture:

Now, add the following lines in the same text file through nano editor as shown in the picture:

Script to add into the file:
#!/bin/sh
unset SESSION_MANAGER
unset DBUS_SESSION_BUS_ADDRESS
startxfce4 &

[ -x /etc/vnc/xstartup ] && exec /etc/vnc/xstartup
[ -r $HOME/.Xresources ] && xrdb $HOME/.Xresources
xsetroot -solid grey
vncconfig -iconic &
After, adding those lines into the xstartup file. Save the changes by pressing CTRL + O then exit with CTRL + X. Now, reboot the Kali Linux either manually or using a command in the terminal.
# sudo reboot
After, rebooting your Kali Linux, you can use the following command to start the vncserver so that you can able to connect to your Kali Linux (raspberry pi) without any screen issues. Hurray!!!
# vncserver
But, there’s a sad thing you can’t automatically start & connect vncserver on your every start of your raspberry pi(Kali Linux). Now we can even get this thing resolved. So, we need to use a script that will basically start the vncserver automatically whenever you turn on your raspberry pi machine. Use the following commands:
sudo nano /etc/init.d/vncserver
Now, add the following lines into the vncserver file with nano editor:
#!/bin/sh -e
### BEGIN INIT INFO
# Provides: vncserver
# Required-Start: networking
# Default-Start: 3 4 5
# Default-Stop: 0 6
### END INIT INFO

PATH="$PATH:/usr/X11R6/bin/"

# The Username:Group that will run VNC
export USER="kali"
#${RUNAS}

# The display that VNC will use
DISPLAY="1"

# Color depth (between 8 and 32)
DEPTH="16"

# The Desktop geometry to use.
#GEOMETRY="x"
#GEOMETRY="800x600"
GEOMETRY="1920x1080"
#GEOMETRY="1280x1024"

# The name that the VNC Desktop will have.
NAME="my-vnc-server"

OPTIONS="-name ${NAME} -depth ${DEPTH} -geometry ${GEOMETRY} :${DISPLAY}"

. /lib/lsb/init-functions

case "$1" in
start)
log_action_begin_msg "Starting vncserver for user '${USER}' on localhost:${DISPLAY}"
su ${USER} -c "/usr/bin/vncserver ${OPTIONS}"
;;

stop)
log_action_begin_msg "Stoping vncserver for user '${USER}' on localhost:${DISPLAY}"
su ${USER} -c "/usr/bin/vncserver -kill :${DISPLAY}"
;;

restart)
$0 stop
$0 start
;;
esac

exit 0
Then, save the changes by pressing CTRL + O then exit with CTRL + X.
Now give the required permission with the following command & to autostart the vncserver:
sudo chmod +x /etc/init.d/vncserver

sudo update-rc.d vncserver defaults
Now, reboot the raspberry pi to check whether our startup script is working or not you can view the vncserver status as active if it is working with the following command:
# sudo service vncserver status
It should show the status as active if you do the above steps properly.

So, now you can able to autostart the vncserver after logging into your Kali Linux. But, to enter into Kali Linux you need to give the login credentials on the Kali Linux login screen so if you wanted to make it a portable machine like you don’t need any monitors to login into your Kali Linux. Whenever you power on raspberry pi you’ll automatically enter into the Kali Linux without giving login credentials. Such that you don’t need any monitors to enter into Kali Linux.
Let’s go ahead to make it a much portable machine.
Steps to auto-logging Kali Linux(Raspberry Pi) :
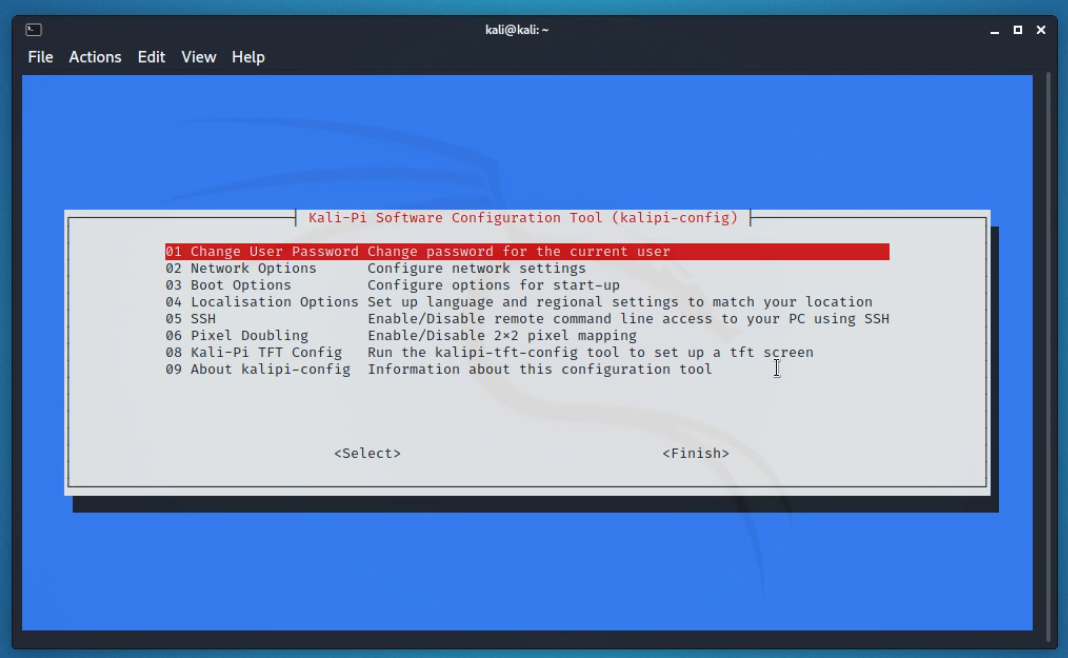
sudo raspi-config
You’ll get the screen like the following picture then use the arrow keys on your keyboard, select
03 Boot Options & press enter key.

Then, you’ll get the screen like the following picture then use the arrow keys on your keyboard, select
01 Desktop / CLI & press enter key.

Then, you’ll get the screen like the following picture then use the arrow keys on your keyboard, select
B4 Desktop Autologin Desktop GUI, automatically logged in as user of your choice & press enter key.

Then, you’ll get the screen like the following picture then enter your kali Linux password & select Ok

Then, you’ll get the screen like the following picture then use the arrow keys on your keyboard & select
Finish option.
Then, you’ll get the screen like the following picture, select the YES option to reboot your machine.

That’s all. Time to relax.
We’ve done Installing x11vncserver, resolved screen issue, automatically started VNC Server on boot, & enabled auto-login on Kali Linux in raspberry pi.
We really hope that you’ve found this text interesting and taken something useful away from it. Consider sharing with your colleagues and peers if you wish to see more articles like this on the web. 🙂